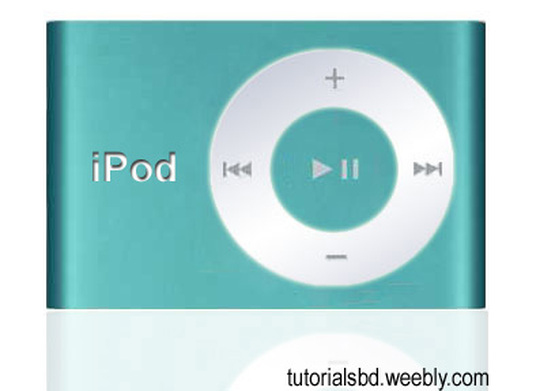
Dear learner today we will learn to create ipod in Adobe Photoshop. For realistic and we use shadow effect. I think you will enjoy. So let’s start to create.
Step1
First of all we create a new document. Its height 500px and width 500px. Put background content white. RGB color mode. Click OK. Create a new layer.  Step2
Create a ipod figure and put gradient color. 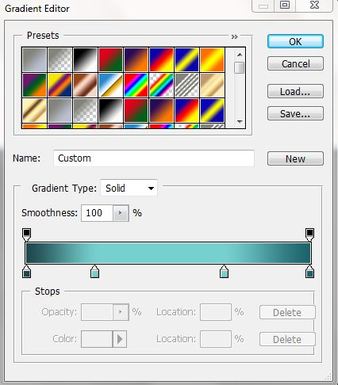 Step3
Look like this. 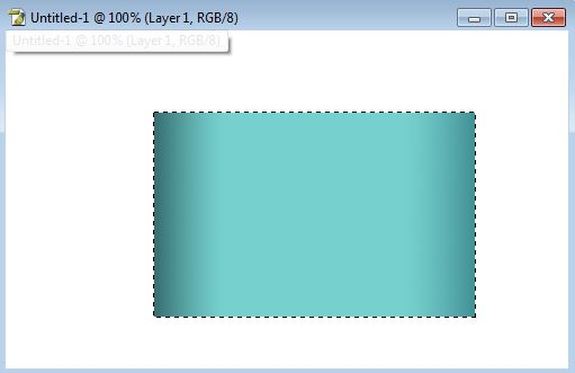 Step4
Again create a new layer and fill color into two side of the ipod figure. 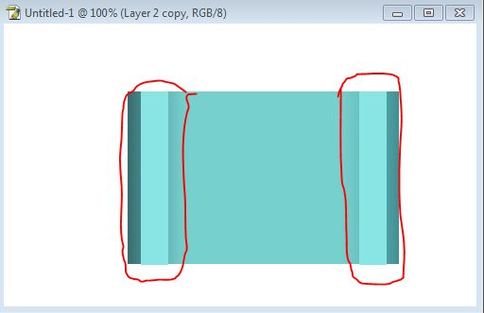 Step5
Go filter>blur>Motion blur. Select distance 34 px. 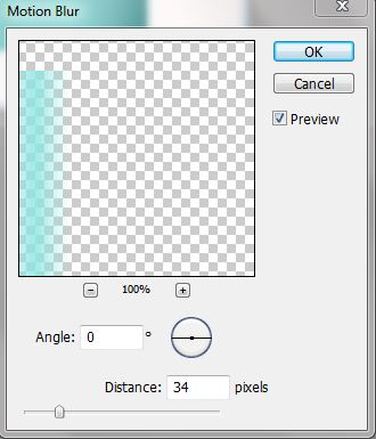 Step6
Picture look like this.  Step7
Now create a round figure with gradient color in a new layer.  Step8
Go layer>layer style. Select outer glow. 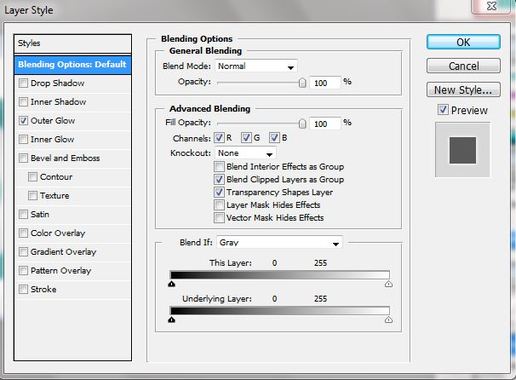 Step9
Create play,push,next,pre button.  Step10
Go to Edit>copy. Then select a new layer and go to edit>paste. Now select Ctrl+T and rotate it 180. 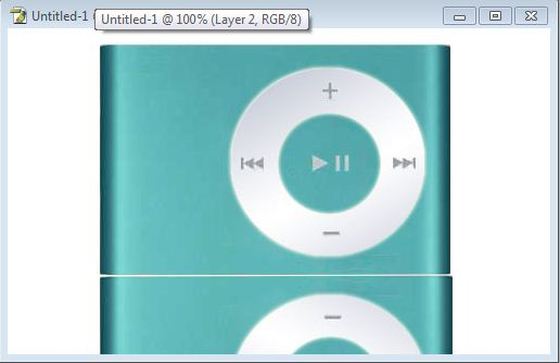 Step11
Change opacity 15%. 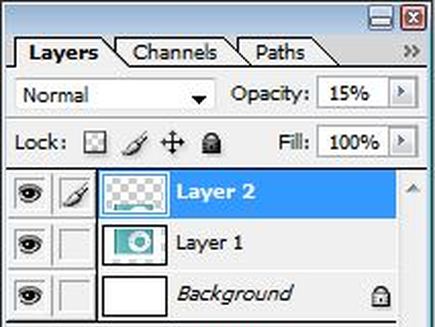 Step12
Now write ipod with white color. 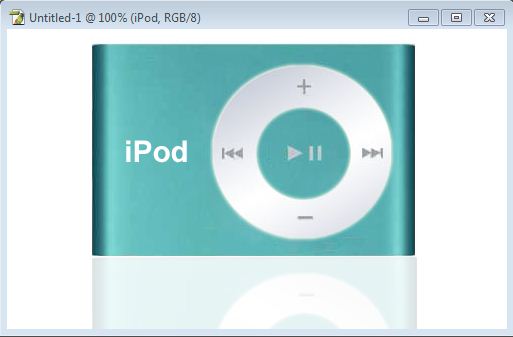
Step13
Go layer>layer style. Select inner shadow. Finally we have done it. If you like this tutorial, please leave your comment. 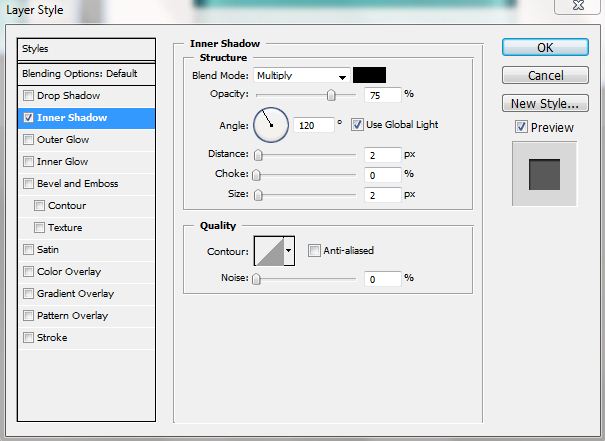
|

|
